 Michael’s Corner #97
January 2011
2011?? Really?!
Hard to believe, isn't it. The 'new' millenium isn't so new anymore. Well, I guess in light of 1,000 years, 10 isn't so far along. Did you realize there's over 1,000 commands listed in the CUI; closer to 1,500 actually. Let's say that this year you learn 11 new commands/features/insights/tips over the course of the next month. I'll try to do my part, too. To that end, rather than specific commands, we'll start the year with some settings and general concepts, such as…
…Features of the Quick View Drawings and Quick View Layouts interface
…Subtle settings when using the wheel button on your mouse
…How to toggle off the frame of a PDF Underlay
…Customizing the plot scale list
What's in store for 2011? The CAD Tutor folks and I are making plans for a special 100th Michael's Corner coming in April, so stay tuned for that announcement, hopefully coming next month. And, of course, the 2nd edition of The AutoCAD Workbench will be available in June. That edition will include the previous 12 months of tips, so I'll have an announcement about that in the Spring.
Blessings to one and all and I hope you have a rockin' solid 2011!
If you would like to contact me directly, you can do that also.
Blessings to one and all,
Michael
Quick View Drawings and Layouts
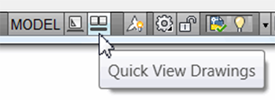 The Quick View features - Quick View Layouts and Quick View Drawings - may not be for everyday use, but they're really great when you need 'em.
Quick View Drawings is the most powerful, in my opinion, because it will display not only the open drawings, but also the layouts of those drawings.
Open two or more drawings - ideally, drawings with multiple layout tabs - then take a look at some of these insights
.Insights to Using Quick View Drawings
Click Quick View Drawings to display thumbnail images for the drawings that are currently open.
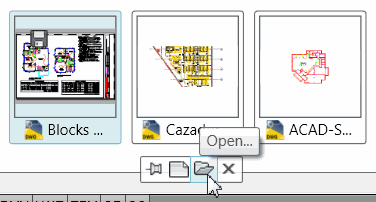
A menu appears with Pin Quick View, New, Open, and Close Quick View. Use the Pin Quick View if you are going to go to another Windows application, then return to AutoCAD.
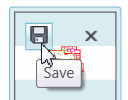
When you hover on a drawing image, you have Save and Close icons in the corners… and the layouts for that drawing are displayed above it.
When you hover on a layout image, you have Plot and Publish icons in the corners.
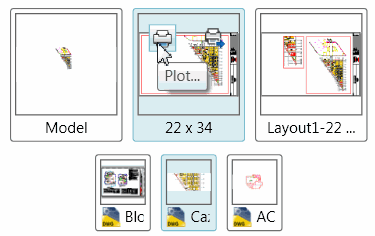
Gold Star Tip: Use Ctrl + wheel scroll to increase or decrease the image size of the drawing or layout.
 If you have a significant number of layouts, you will see an arrow in the layout image to dynamically scroll right (or left).
The Quick View Layouts feature displays layout images for the current drawing only. That's why I typically prefer to use the Quick View Drawings - I can display any drawing/any layout.
Power Tool
Turbo your Wheel Mouse!
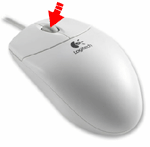 These tips are so very simple, but can make you so much more productive.
Tip #1
When you roll the wheel to Zoom In or Zoom Out, it zooms based upon where your cursor is!
Tip #2
Press the wheel down like it's a button to Pan your drawing
The variable MBUTTONPAN must be set to <1>
Hold down the Shift key while you're panning to, essentially, 'Ortho-fy' your pan!! (I made that word up, but I know you understand).
If the Pan feature is not behaving, in the Wheel setup portion of the mouse software, you may need to adjust the current setting.
Tip #3
Double-click the wheel for a Zoom Extents (manual dexterity required).
Tip #4
To adjust the magnification/reduction of the drawing with each notch of the wheel when zooming, change the variable called ZOOMFACTOR.
The default for the ZOOMFACTOR variable is <60>. If you're working mainly in floorplans, you may find <30> to be more elegant.
If you're working with GIS or mapping applications, set it all the way up to <100> (the upper limit).
If you really want to mess with somebody's head, set theirs to <3>.
The Odd Spot
PDF Frame
 Over the Christmas holiday, one of my customers emailed me regarding the frame that appears, by default, around a PDF Underlay (ironically, covered one year ago in Michael's Corner, January 2010, or p. 95 in my book, The AutoCAD Workbench).
Since it is frame-like, I suspected the variable TFRAMES, but the response indicated that the variable only works if images or wipeout objects are in the drawing. Hmmm.
Alright, let's see what other options there are for "frames" in AutoCAD. Using the wildcard method to search for system variables (see Michael's Corner, October 2006 or p. 18 in The AutoCAD Workbench), I discovered there's a variable called PDFFRAME. Set that variable to <0>, and the frame disappears!
Note: Per the System Variable Editor (June 2004 or p. 19), the PDFFRAME variable is saved by Drawing.
The Basics
Viewport Plot Scale
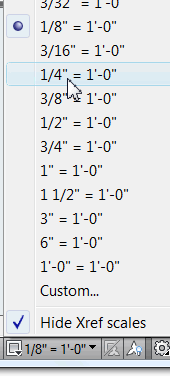
 By default, when you switch over to a new layout tab, AutoCAD zooms to the drawing extents within the viewport.
To set the viewport scale, activate the viewport, then click Viewport Scale on the right half of the Status bar (the one that probably displays an odd decimal value) and select the desired plot scale from the list.
How to Edit the Plot Scale List
Open the Options dialog box (big red letter 'A'
 Options below the drawing name listing).
Click the User Preferences tab, then click Default Scale List (A2011) or Edit Scale List (all other versions) to open the dialog box listing the available plot scales.

To delete unwanted/unused plot scales from the list, select the ones you want to get rid of (pick & drag, or use Ctrl or Shift to make your selection), then click the Delete button.
Note: In case you delete the wrong ones or want to start over, click Reset. The Reset feature is also useful if you have an inordinate number of plot scales as a result of Xrefs in the current drawing.
To position your most frequently used plot scales, select the desired scale, then click the Move Up or Move Down buttons.

When you're finished, click OK to close and save your changes, then click OK to close the Options dialog box.
Important: The scale list is saved by Drawing. Therefore, it would be best to configure the plot scales in your template and at least that way, whenever you use your template, your edited plot scale list is available.
Left Field
In Case You Were Wondering: Col. Harland Sanders' handwritten recipe for his famous original Kentucky Fried Chicken was placed in a new electronic vault last February at corporate headquarters in Louisville. The recipe, on a single sheet of yellowing paper, is protected by an array of high-tech security gadgets, including motion detectors and cameras that allow guards to monitor the vault around the clock.
Donate to CADTutor
If you found this article useful, you might like to consider making a donation. All content on this site is provided free of charge and we hope to keep it that way. However, running a site like CADTutor does cost money and you can help to improve the service and to guarantee its future by donating a small amount. We guess that you probably wouldn't miss $5.00 but it would make all the difference to us.
Note from Michael: I want to thank all of my customers for continuing to retain my training services (some for over three decades!) and let you know your donations do not go to me personally, but to the ongoing maintenance of the CADTutor ship as a whole and to support the yeoman efforts of my friend and CADTutor captain, David Watson, to whom I am grateful for this monthly opportunity to share a few AutoCAD insights.
The Basics
- Dual Dimensions in a Dim…
- UCSICON Options
- "Best of" Basics: Irreg…
- Tool Palette Basics
- Original Dimension Value
- Possible Solutions to th…
- Avoid Using 'Standard' i…
- Shorten the Plot Scales…
- Update the Source File B…
- User Increment Angles fo…
- Drawing Information
- 'Sign Language'
- Rotate with the Copy Opt…
- Use the INSERT Osnap on…
- To or From the Current L…


